Automate Web Photo Gallery in Photoshop
If you want to do the photo gallery in your website.I introduce you to use automate gallery function in photoshop.
It is the easiest way to do, very fast and really save time!
here is how to do...
Step 1. Make sure you have install adobe photoshop on your computer. (photoshop 7 or higher is recommended)
Step 2. Preparing 2 folders.
- 1st folder with include your images for doing photo gallery.
- 2nd folder for saving the files which photoshop will generate web gallery.
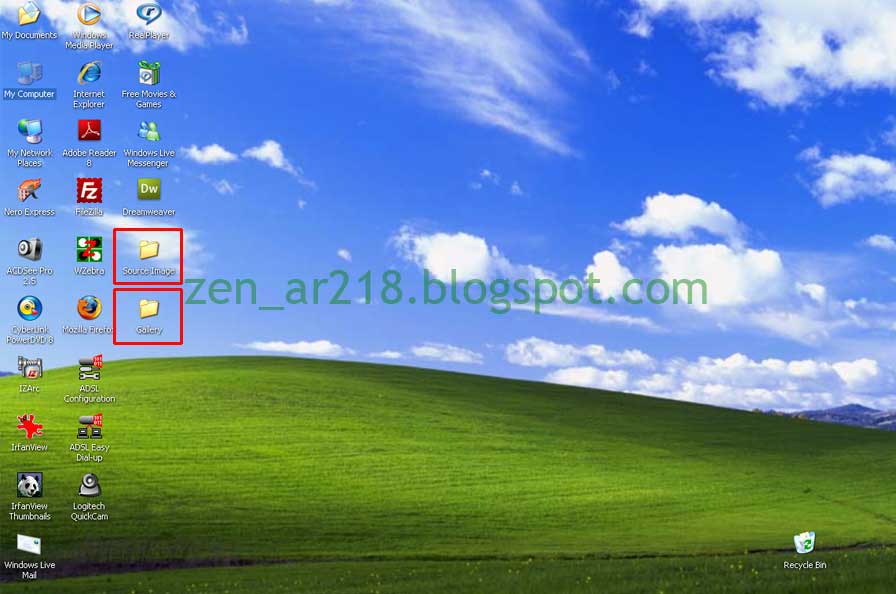
I prepare 2 folder which name Source Image and Gallery.
Source Image folder contain the images that you want to do the gallery. Gallery folder contain nothing inside.
Step 3. Open Photoshop, Choose=>file=>Automate=>Web Photo Gallery 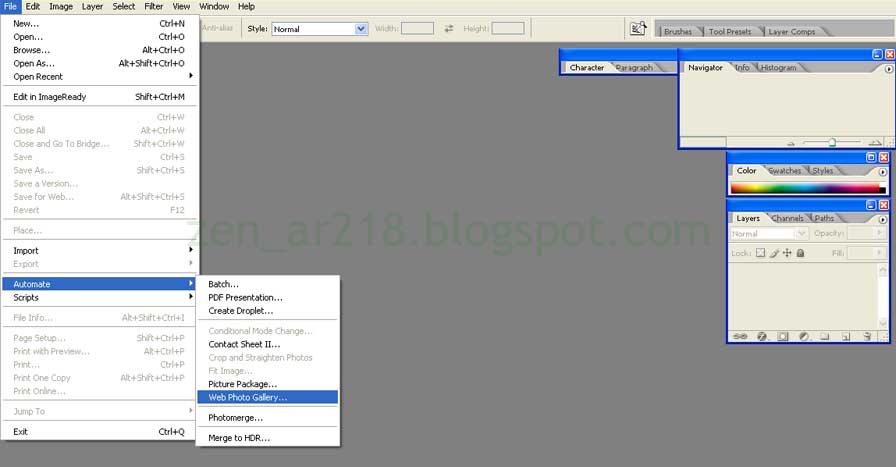
Step 4. Now you are in the automate web photho gallery function which has many sub-menu.
-Styles Menu: choose the style of gallery that you like ( There are many style, you can try them all later)
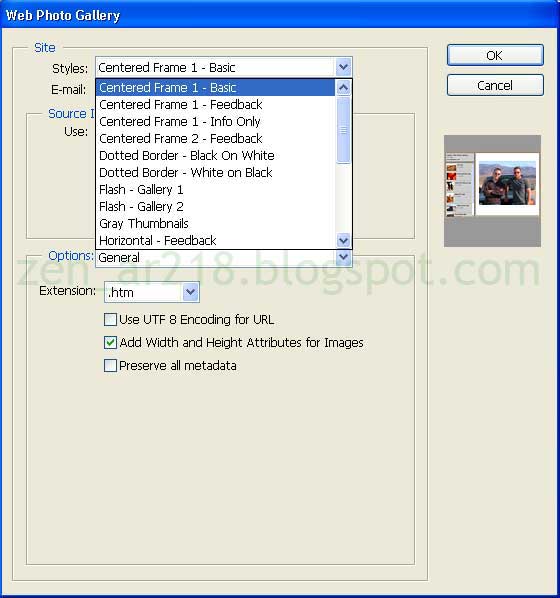
-Email: Insert an email or leave it blank
-Source Images
- Use: Click Browse and point to your 1st folder (my 1st folder name Source Image) and then click OK.
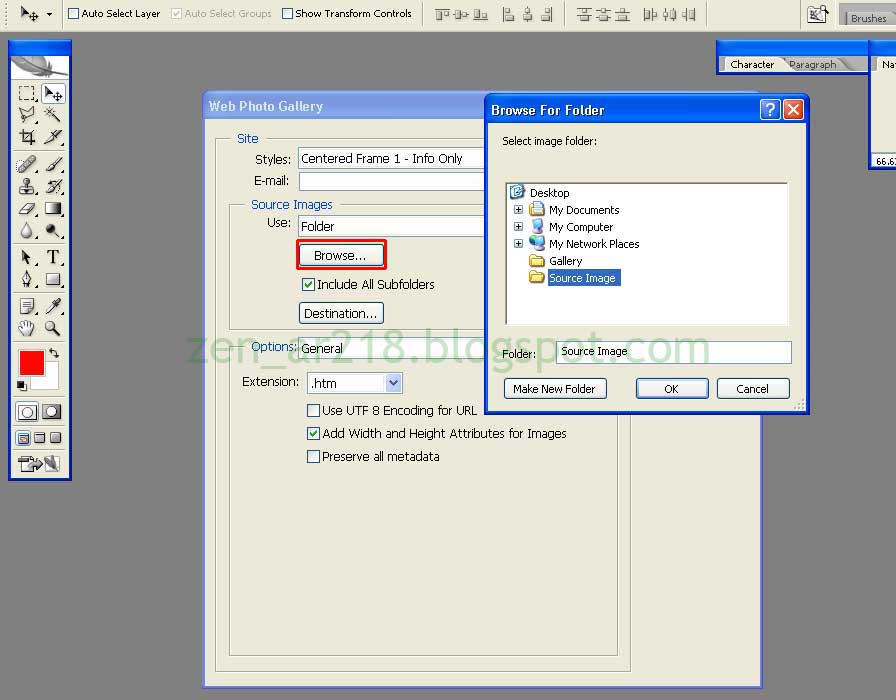
- Destination: Click Browse and point to your 2nd folder ( my 2nd folder name Gallery) and then click OK.
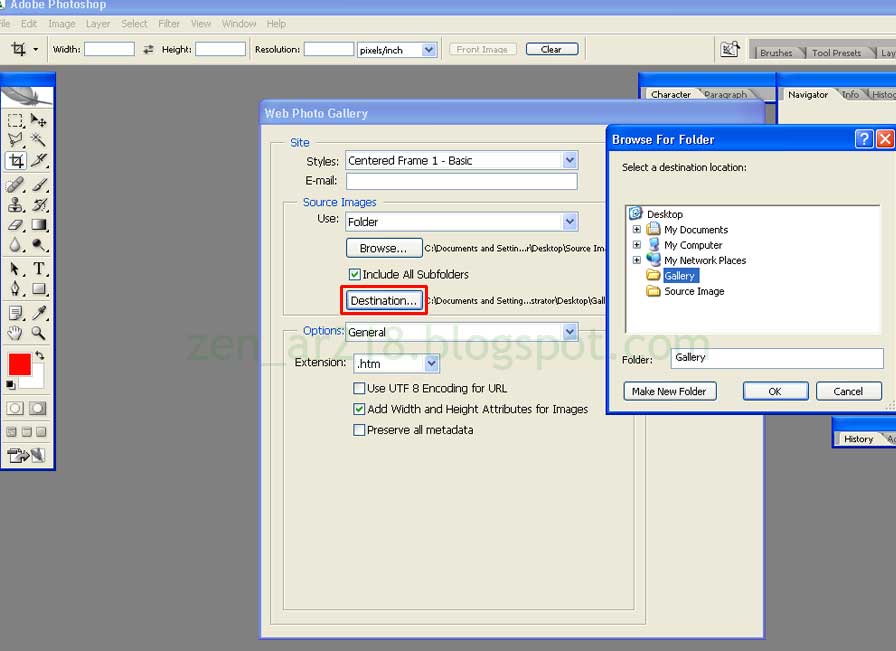
-Option
- General: export file setting
- Banner: You can inset your site name, contact info, photographer, date.
- Large Image: specific size and quality of large image in the gallery
- Thumbnails: specific size of thumbnails in the gallery
- Custom Colors: CSS color style of your gallery
Step 5. after you have satisfy your setting then click OK.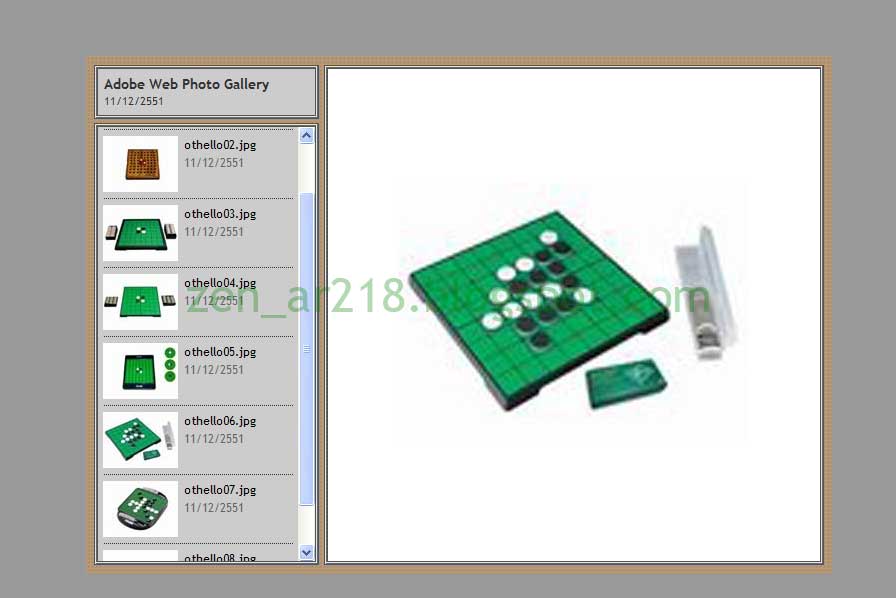
Step 6. Now, the gallery has created. But if you still don't like it, you can redo it all over again!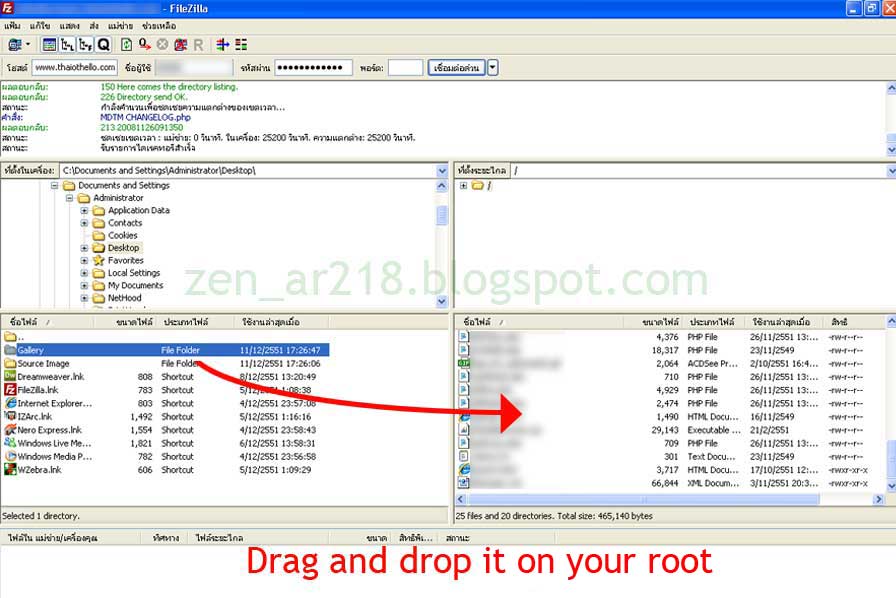
Step 7. Upload it to your website! using your favourite ftp program and then upload the 2nd folder(my 2nd folder is name Gallery) to your root.
Finish!!!
For this example, the URL to access to the gallery will be:
http://yourwebsite/Gallery/index.htm
Note:
- If you already have the folder named Gallery in your root then you might change the 2nd folder name to whatever you want. (The URL to access to the gallery will change also)
- You can edit the file index.htm in HTML to match your website, i.e. change header, footer.
- You can edit gallery CSS style in the file name galleryStyle.css that locate in the sub folder name images.
- You can see my live site photo gallery that using this method here:Example Gallery (more than 200 pictures but It takes only 30 minutes for creating :))


1 comments:
you are in the automate web photho gallery function which has many sub-menu.
Computer Training Ny
Post a Comment